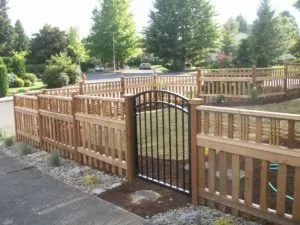
While chain link fences or wire fencing and their metal components last much longer and can be less expensive, many of us in the Pacific Northwest think a good cedar fence just can’t be beaten. They provide more privacy, provide a warmer atmosphere, and just look great even after some aging. But they don’t last forever, and wood fence removal can be a big job.
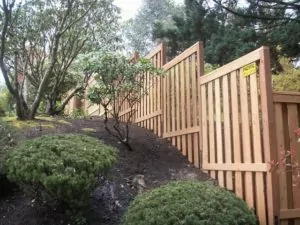
A wood fence can last anywhere from 10 to 20 years and even longer with proper maintenance. But, eventually, you’ll need to replace your fence or at least the sections of the fence between the posts. While a nice patina forms on weathered cedar, when it’s covered with moss or rotting at the edges, it’s time to start over.
And if the posts are rotting at the bottom, you may not have a choice in your fence removal: a strong storm will knock it down for you! So it’s better to remove the fence on your timeline instead of having Mother Nature make the decision for you.
Steps For Wood Fence Removal
Many fencing contractors offer wood fence removal services, but if you’re up for a challenge and somewhat handy, you can do it yourself. Here are a few tips to follow when removing a wood fence:
- Talk to your neighbors
- Follow codes, rules, and regulations
- Plan the wood fence removal
- Gather tools
- Safety First!
- Begin wood fence removal
- Take away debris
- Prepare for a new fence
Talk to Your Neighbors
Start your pre-demolition work by making sure the fence is yours. If you built the fence, and you’re confident you built on your side of the property line, you’re good to go. If a fence was there when you moved into your home, the situation is less clear.
The fence could belong to your neighbors, or it might be sitting on the adjoining lot. Some people share ownership of a fence. Talk to your neighbors before you start your project. Even if the fence is clearly on your property, it’s a good idea to let the people next door know your plans.
Follow codes, rules, and regulations
 Don’t violate building codes–some areas require a building permit for a fence. Your town or city may have restrictions on fence heights or styles. If you live in a neighborhood with a homeowner’s association, you may need to get approval when you change any landscaping or hardscaping. If you’re in violation of the code, you could get a fine.
Also, don’t start digging until you know the location of the utility lines: You always need to call the Before-You-Dig service before a project that requires excavation. A 6-foot fence, a typical height for privacy fences, needs 8-foot posts buried at least two feet in the ground. That’s deep enough to hit a pipe, power, or cable line. Take care of this now, so you’ll have smooth sailing when it’s time to install the new structure.
Plan the wood fence removal
Will you take the fence apart plank by plank or do you have the room to remove entire sections? Is there landscaping in the way that could be damaged during the process? Do you need a tarp to catch any loose nails or screws and for the discarded fencing materials? Plan how you’re going to take the fence apart so you can’t take the appropriate steps before beginning.
Gather tools
Depending on how you’re performing a wood fence removal, you may only need a hammer or prybar. If you’re going to cut the sections out, a circular or reciprocating saw will do the trick. Get your tools in one place so you’re not having to run back and forth from the garage or shed to get what you need.
Safety First!
Safety goggles, gloves, and long pants should be included when you’re gathering tools. With nails flying and wooden fencing materials falling, you could get some nasty scrapes if you’re not paying attention. But safety also includes keeping small children and pets away from the work area.
Begin wood fence removal
Piece By Piece–As we mentioned before, there are a few different ways of taking down a wooden fence. The first is to remove each slat in the fence one by one. This is a longer process, but easier to manage if you’re doing the work by yourself.
Carefully hit the backside of the slat with a hammer until there’s enough room to get a prybar in between the slat and the rail (the horizontal piece running from post to post). Then go around to the front and tap the slat back into place. This should leave a little gap where you can use the claw end of the hammer to pull the nail out. Have a bucket handy to collect the nails.
When all the slats are removed, remove the nails or screws that are holding the rails in place. Take each piece you remove to a predetermined area for easier cleanup and debris removal. Remove any brackets so all you’re left with is a standing fence post.
Section By Section–This is faster but will require help, power tool knowledge, and some muscle. While someone holds the fence steady, cut the rails as close to the post as possible without hitting the brackets. You may need to remove the slats nearest the post to make room.
Once the final rail cut is made, carefully carry the section away from the rest of the fence. It’s best if you have a junk removal dumpster handy or a utility trailer of some sort to gather all of the discarded wood.
Taking Out the Fence Posts–This is often the hardest part of fence removal because if the fence was installed correctly, you have to deal with two feet of buried concrete. However, if the posts are in good shape, you may be able to use them for the new fence (an ideal situation). But if you plan on replacing the wooden 4x4s with metal posts, they need to come out.
You can dig around the post until you can remove the post or if the ground is soft enough, you can push the post back and forth until it loosens. Be careful, though: a rotted-out 4×4 can snap and send you flying! As a last resort, you can cut the posts at the base and leave the concrete in place. But, sooner or later, you’ll have to deal with those heavy hunks of concrete.
Take away debris
Toss everything up into the dumpster, trailer, or truck bed and haul it off to the dump or recycling center that takes wood-type of fencing materials. You may need to pull out all the nails of the boards before they will be accepted. Call ahead to make sure you don’t waste a trip.
Prepare for a new fence
Once the old fence is taken away, you can start prepping for the new fence. This may include digging new post holes if the old post holes have become too big during removal. It’s important that the earth around the posts is solid so there’s no settling. Reusing larger holes means more concrete, too.
Final Thoughts on Wood Fence Removal
 As a way to save money, many homeowners may consider fence removal as a do-it-yourself project. But if you don’t have a truck or trailer to take the debris away, you may need to rent a vehicle and there’s also the cost of dumping the debris. At that point, the fence removal cost can start to creep up–not to mention the cost on your back!
You should also consider how fast you’ll be able to put the new fence up. If you do have children or pets (not to mention stuff that might be of interest to thieves), waiting until the next weekend to put up a new fence may not be a great idea. You might be better served getting in touch with fencing contractors in your area to get a professional fence installed.
Many fencing companies will include the wood fence removal cost in the final fence installation cost. Once you consider the average cost per linear foot of fencing, having the experts take care of the wood fence removal could make a lot more sense (and allow you to enjoy the weekend).
Pacific Fence & Wire have been in the business of fence removal, fence installation, and fencing materials for more than a century. We work efficiently, safely, and have the tools to get the job done right. For help with a new fence, contact us today.