Reignite the glow of cedar boards by learning how to stain a fence. Refreshing a fence with stain is easy. It requires just two basic steps: cleaning and staining.
When Is the Best Time to Stain a Fence?
Wait a few weeks before staining a new fence. Why? Wood is affected by light, temperature and humidity. It needs time to adapt to its new environment.
Early or late summer are good times to stain a fence. You’ll need a few days of dry, warm weather, both before and after you stain. The boards need to be completely dry.
A cloudy day, early in the morning or late in the afternoon are good times to work. In general, it’s better not to paint in direct sunlight. You won’t have to wait long for a cloudy day in Oregon. Follow the manufacturer’s recommendations for temperature range.
Why Stain a Wood Fence?
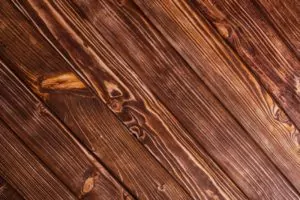
Treating your fence protects it from rain, sun and rot. Cedar naturally resists mildew, but a finish gives it more staying power. When the boards are protected against moisture, they’re less likely to warp. Staining also restores the look of cedar that has turned gray and dingy.
What Kind of Stain Is Best?
Choose a stain with UV protection to slow the destructive effects of sun. Look for a product that has fungicide.
Stains come in a range of colors and pigmentations. Some provide more coverage, but all allow the wood’s grain to show. Stains are classified as semi-transparent, penetrating or solid.
Get a small sample of your top three choices. Apply the samples to a discreet area of the fence, or to a spare board.
Ready, Set…Hold On a Minute
Before you start staining, clean your fence. Staining won’t go well if you try to paint over mildew and dirt. After you wash the fence, allow it to dry for a few days.
A light setting on a pressure washer does a great job of cleaning. The scrubbing exfoliates the wood, revealing a fresh layer primed for absorbing stain. No pressure washer? Read our post on money-saving cleaning solutions you can make yourself.
Gather Your Tools
Apply the stain using a combination of rollers and brushes. You’ll need the following tools:
- Long-handled roller and trim roller
- Paint pan
- Four-inch wide brush and trim brush
- Rubber gloves
- Eye protection such as goggles
- Canvas or plastic sheets
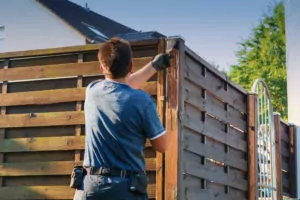
Apply the Stain
Lay sheet over plants, grass and ground. Move pots and furniture to a safe distance. Follow the manufacturer’s instructions. Here’s the general procedure for how to stain a fence:
- Using the roller, dip into the stain. Apply in an even coat. Work from top to bottom. Starting at the top helps prevent drips.
- After completing a 3-foot section with the roller, work the stain in with a brush. Work the product into corners. If you have a partner, the work will go more quickly. One person applies the stain with the roller, the second follows behind with the brush.
- Follow the procedure in step 2 using the trim roller and brush.
- Refer to your product directions to learn if you need a second coat.
Your newly stained fence should look good for several years. Inspect the boards at least once a year. Give problem areas a touch up as needed.
Portland Fence Installation and Repair
At Pacific Fence & Wire, we love building beautiful fences. Get in touch if it’s time for a new fence. We’ll design the perfect perimeter for your yard.